

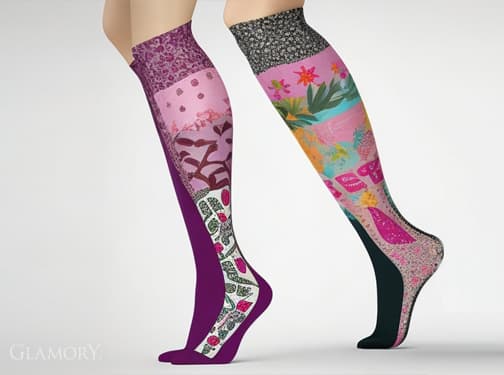
Hello, Glamory lovers! It is time to let our creativity run free again and shake up our wardrobes with an exciting project. In the world of plus size fashion, we often feel we have to take whatever the market offers. But why not become a designer yourself? Today is all about the creative ways you can transform your Glamory styles into unique masterpieces. We will show you how to customise your tights like a pro. Yes, you read that right! With a little imagination, the right materials and our expert tips, you can create personalised designs that nobody else will be wearing.
Why customise your own tights?
Customising is a huge trend. It is not just about saving money, it is about expressing your personality. When you decide to customise your tights, you open the door to endless possibilities. Whether for your next festival, an 80s theme party, an elegant dinner or just to add some colour to a grey Tuesday, your legs become the canvas. It is also a fantastic way to upcycle and give styles that may already have been worn a little a second life.
Customising tights: preparation is everything for clean results
Before we pick up a brush, we need to talk about technique. A common mistake is to lay your tights flat on the table and paint them. The result? The pattern distorts completely as soon as you put them on and the fabric stretches.
The pro tip: the "cardboard leg"
To make sure your design looks exactly as planned on your leg, the tights need to be stretched while you work on them. Make two tubes from sturdy cardboard (or use thick postal tubes) that roughly match the circumference of your calves or thighs. Carefully pull the tights over them. This recreates the volume of a worn pair, so the paint will not crack later when the fabric stretches. It is the most important step if you want to customise your tights successfully.
Materials you will need
The quality of your materials determines how durable your design is and how it looks. Here is your shopping list:
- The base: A fresh, clean pair of Glamory tights. For beginners, we recommend more opaque styles (from 40 denier), as they offer more surface and are more stable. Take a look at our tights to find the perfect base.
- Paints: Use special fabric paints for light or dark fabrics. Important: make sure they stay flexible when dry! Ordinary acrylic paint can harden and crumble. Fabric markers are an alternative for finer lines.
- Tools: Brushes in different sizes, sponges (great for colour gradients) and stencils.
- Appliqués: Hotfix rhinestones (iron-on), beads, lace or sequins.
- Glue: A good-quality, flexible fabric glue is essential.
- Protection: Old newspaper or plastic sheeting.
Step-by-step guide
Step 1: Cleaning
Give your tights a quick wash first (no fabric softener!) to make sure they are clean and free of grease. Residues from production or body lotion can stop the paint or glue from sticking properly.
Step 2: Decide on your design
Your imagination is the only limit. Decide on your design: it can be minimalist or wild. Polka dots are a great place to start. If you are feeling braver, try ombré gradients or graffiti styles. You might want to sketch your idea on a piece of paper first.
Step 3: Paint, paint, paint!
Pull your tights over your cardboard tubes. Now start applying the paint. If you are working with stencils, dab the paint on carefully with a sponge rather than brushing it on, so nothing runs under the edges. Do not worry about small "mistakes": when you customise your tights, little irregularities are often what gives a one-off piece its charm.
Step 4: Add appliqués for pure glamour
You can personalise your tights even further by adding 3D elements. A line of rhinestones along the back seam (back seam look) looks incredibly elegant and visually lengthens the leg. Use the fabric glue sparingly but precisely. Let your imagination run free and make your tights a real eye-catcher!
Step 5: Drying and fixing
Patience is a virtue. Give your creation at least 24 hours to dry. Many fabric paints then need to be heat-set to make them washable. To do this, place a thin cotton cloth (such as a tea towel) over the dry design and iron carefully on a low setting (no steam!). Always check the heat instructions on the paint packaging first and work your way up slowly so you do not melt the nylon.
Creative ideas for advanced DIYers
Caught the bug and want to get even more creative when you customise your tights? Here are three on-trend ideas:
- The tattoo effect: Take a pair of skin-tone or very sheer 20 denier tights and draw motifs on them with a black fabric marker (such as roses, lettering or birds). On your leg, it will look like a real tattoo.
- Distressed look: A trend from the punk scene. Carefully create small holes or ladders and stop them at certain points with clear nail varnish. Combine this with safety pins or rough stitches in brightly coloured thread.
- Dip-dye (colour gradient): Light-coloured tights (white or cream) can also be dyed. Dip the toes into a fabric dye bath for a soft gradient that fades upwards.
Care instructions for your works of art
A handmade piece deserves special care. We recommend strict hand washing for all customised tights. That protects not only the glued-on stones but also the intensity of the colours. If you are looking for inspiration for more DIY projects, the German website Burda Style often has great ideas around fabric embellishment.
Conclusion: your design, your moment
Decorating your legwear with fabric paints and appliqués is a fun and creative way to express your personal style. Best of all, it is something people of every age and every dress size can do. When you decide to customise your tights, you are investing time in yourself and your confidence.
We hope this blog post has inspired you, and we look forward to seeing your unique designs on social media. Do not forget to tag us so we can admire your creations. Have fun designing and wearing your personalised Glamory tights!